Automated Templates allow Users to bulk send documents with just a few clicks. Each document will be personalized for external guests.
The following instructions are for the Automated Template with Excel feature. For the Automated Template with Salesforce instructions, please click here.
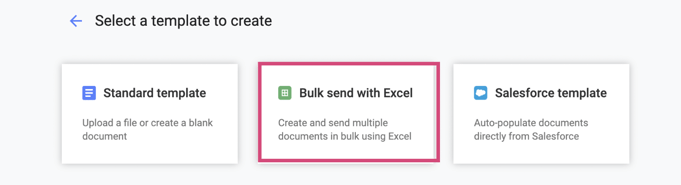
How to create a new Automated Template with Excel
- From your Document Inbox, click New Document or Create Template.
- Select Bulk Send with Excel.
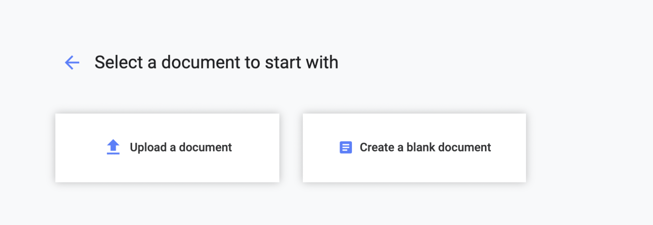
- Select an option: Upload a document or Create a blank document.
- You'll see a visual indicator of Excel Automation in the top title bar.

Changing a Standard Template to an Automated Template
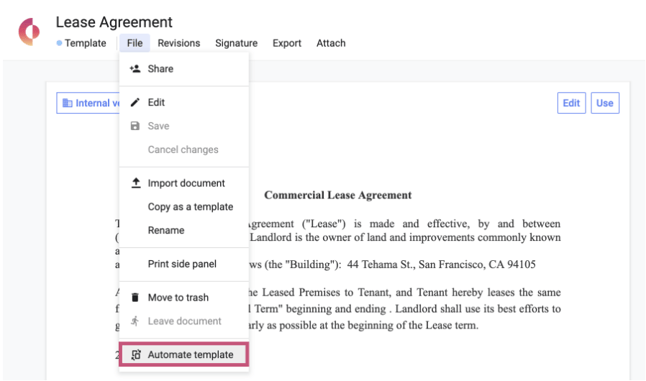
- Open a Template.
- Click File.
- Click Automate template.
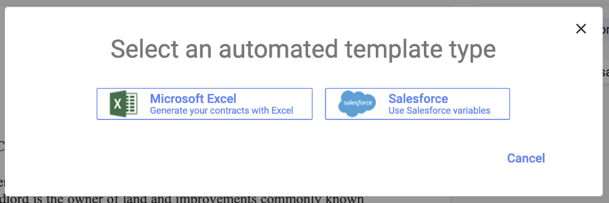
- Only applicable for Salesforce integration users: click Microsoft Excel in the "Select an automated template type" pop-up. For more information on setting up the Salesforce integration, visit here. This guide will focus on the Excel automated template.
- The Automated Template will be available in the Templates tab to the left of your Document Inbox.
Creating Automated Variables
- Automated Variables give Automated Templates extra power to merge dynamic information across contracts using one Excel file. Each variable set up in an Automated Template will correspond to a column in the custom Excel file generated for each automated template.
How to insert variables
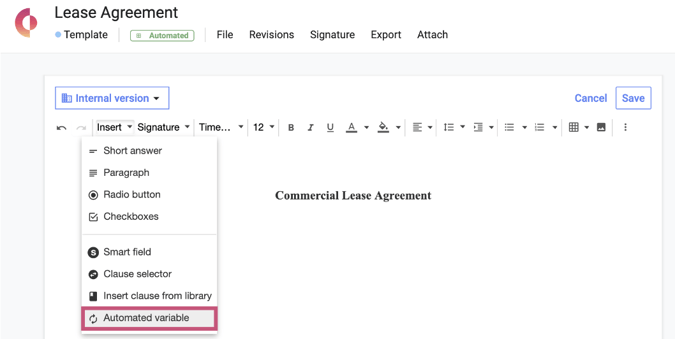
- Click Edit.
- With your mouse, highlight the text you'd like to turn into a variable (ex: "Signee mailing address") or place your cursor and click where you want to set the variable.
- Click Insert.
- Click Automated variable.
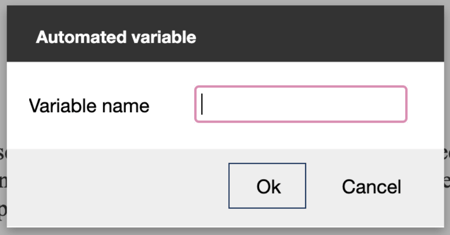
- The highlighted text will turn into a variable. If you did not highlight any text, you would be prompted to enter a variable name in a pop-up window. Once you have typed your variable in the 'variable name' field, click Ok:
- Click Save.
Downloading the Excel Template
- Click File in the top toolbar.
- Click the arrow beside the Automated template.
- Click Download Excel template.
Using an Automated Template
- Using the template is the next step; to learn more, click here.
This feature is available on our paid plans.