Concord's Salesforce integration allows users to:
- Quickly create and send documents in Concord directly from Salesforce using pre-configured automated templates
- Automatically populate documents in Concord with data directly from Salesforce
- Keep data in Concord and Salesforce up to date with two-way synchronization across platforms
This feature is available on our Pro and Enterprise plans
Installing Concord's Salesforce App
- Login to your Salesforce account and navigate to the Salesforce App Exchange
- Search for Concord
- Select Concord's application

- Select Get it Now
- Follow the installation prompts
Configuring the Opportunity Page Layout in Salesforce
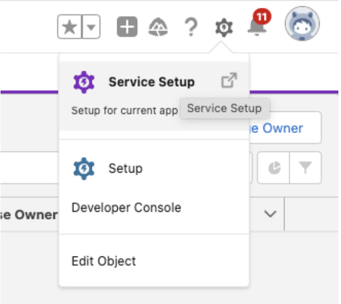
- In Salesforce, click on the cog icon in the header and select Service Setup
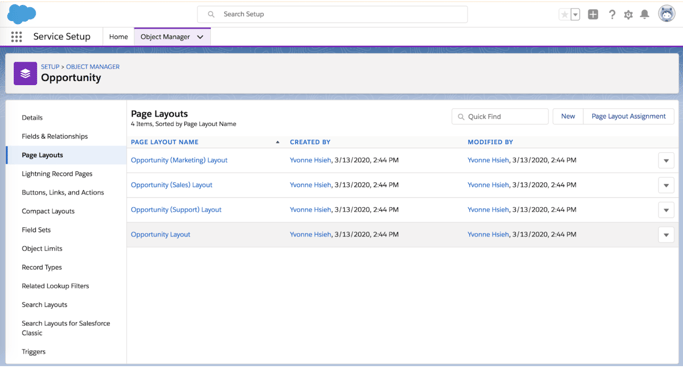
- Select the Object Manager tab
- Select Opportunity object from the list
- Select Page Layouts from the sidepanel on the left
- Select Opportunity Layout from the list
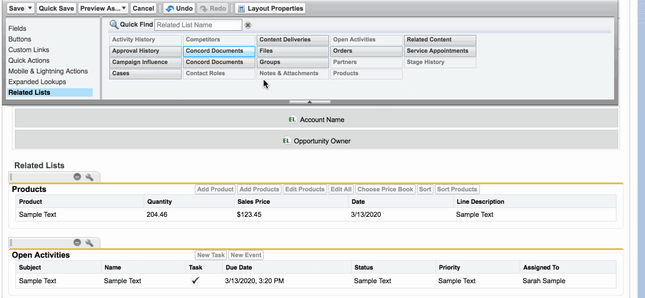
- In the palette located at the top of the page, select Related Lists. The page will scroll to position the Related Lists section directly beneath the palette.

- Drag and drop Concord Document from the palette into the Related List section (see below)
- From the Concord Documents section, click on the wrench icon to open the Related List Properties modal
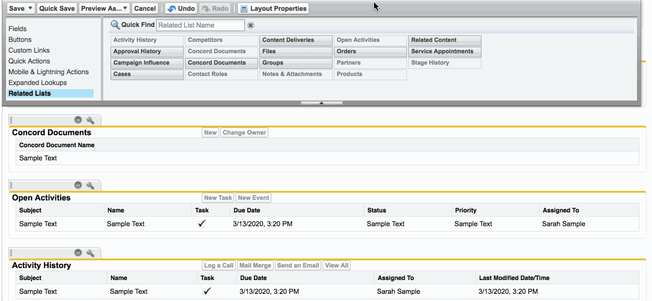
- In the Columns section, from the Available Fields column, select the fields to display on the related list. Click the Add button to move the fields to the Selected fields column. We recommend selecting the fields shown in the screenshot below.
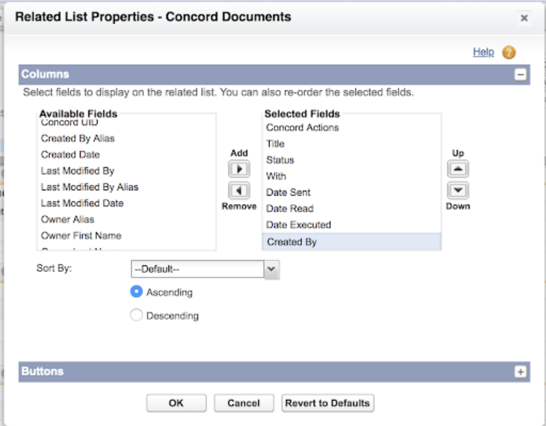
- Expand the Buttons section by clicking on the "+" icon to the right of Buttons
- In the Standard Buttons section, uncheck both New and Change Owner (see below)
- In the Custom Buttons section, select the New document with Concord option and Add it to the Selected Buttons section (see below)
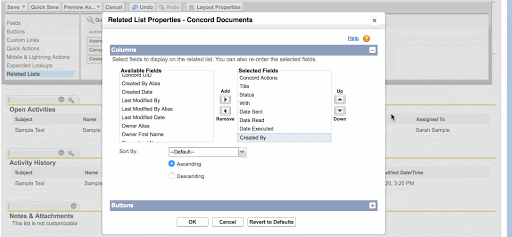
- Select the OK button to save settings and close the Related List Properties - Concord Documents modal, and return to the Opportunity Page Layouts page.
- In the palette located at the top of the page, select Buttons. The page will scroll up to display the Opportunity Sample directly beneath the palette.

- Drag and drop New document with Concord from the palette to the Custom Buttons section (see below)

- In the palette located at the top of the page, select Mobile & Lightning Actions
- Drag and drop New document with Concord to the Salesforce Mobile and Lightning Experience Actions section
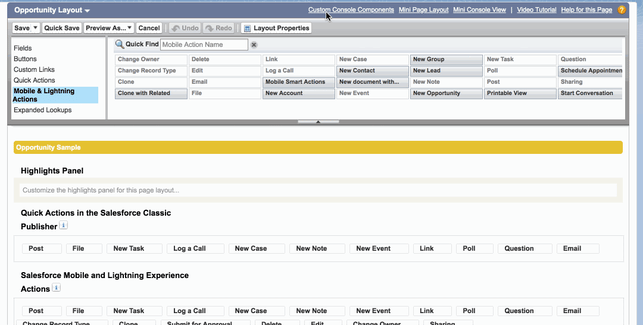
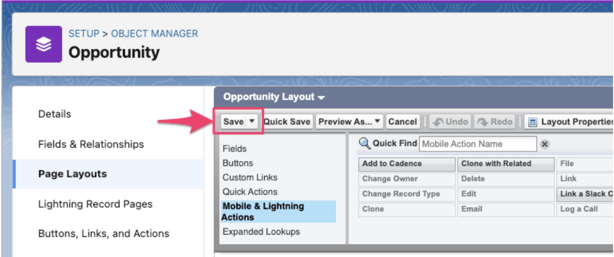
- At the top of the palette, click the Save button to save all changes to Page layouts.
Connect your Concord Account
- Click on the App Launcher located in the top-left corner of the page and select Concord from the Apps listed. You can search for 'Concord' to locate the app quickly.

- Select the Concord tab
- Select the Connect account button
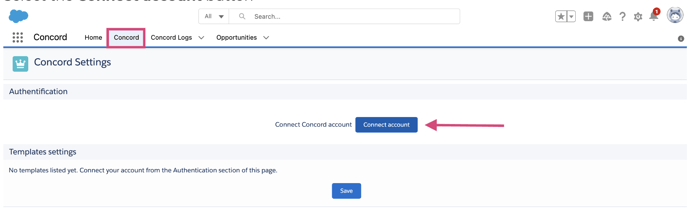
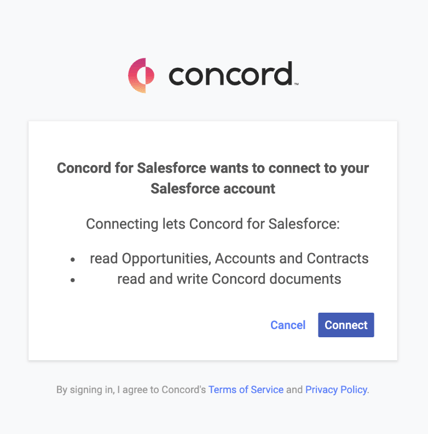
- Follow the prompts to allow the integration.
NOTE: Concord customers who are users (using a single email address) in multiple companies (both subsidiary and standalone companies) will be able to generate documents using the Salesforce integration for all accounts tied to the email address they used to connect to Concord.
Selecting a default template for use
Once you have connected your account, you have the option to choose a template that will be automatically selected when you create a document from Salesforce. This setting is useful if you are creating a majority of your documents from a single template. The selection can be changed to another template, if necessary.
- On the Concord Settings page in the Concord Settings section, select the template you would like to be selected upon arrival when creating a document in Salesforce from the Select Source Document input.
- Optionally, you can also select None and have no template selected by default.
- Select the Save button beneath to save your changes.

Configuring sharing permissions
You can choose the highest level of document access invited parties can be given for both templates and documents uploaded to the Notes and Attachments section of an Opportunity. Lesser Editing Rights can be selected when a document is being created, but not higher ones than those set here in the Concord Settings.
About access rights in Concord
These selected permissions align with the access rights given to invited participants in the Share settings for each document in Concord. You can change the access rights of each participant invited to the document after sharing it from within Concord.
| Sharing permission | What can be done in Concord |
| No editing rights (Viewer) | Invited parties cannot edit the document content or fill fields. |
| Limited editing rights | Invited parties can fill fields assigned to them but cannot edit the document content. |
| Full editing rights | Invited parties can edit the document content and fill fields assigned to them. |
These access rights apply to both internal users and external third-parties invited to the document.
Note that participants invited to the document who are meant to fill fields and/or sign the document require Limited editing rights or higher.
- On the Concord Settings page in the Documents from Notes and Attachments Settings section, select the highest level of access you would like to be available when sharing the document.

- Select the Save button beneath to save your changes.
- On the Concord Settings page in the Templates Settings section, select the highest level of access you would like available per template.
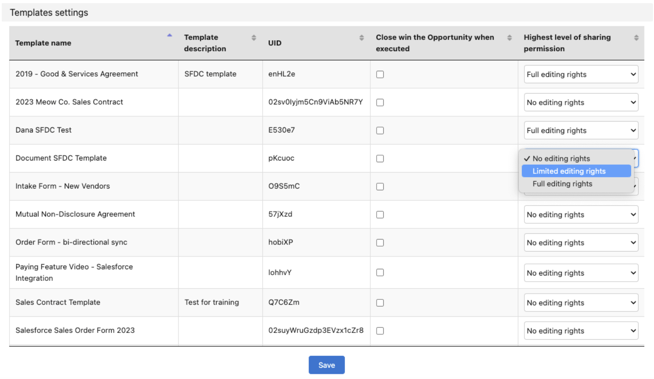
- Select the Save button beneath to save your changes.
Selecting fields to be sent to Concord
Select the fields you would like to send to Concord. These fields will be available to insert in your Concord template. You can insert any field from:
- Account objects
- Opportunity objects
- Opportunity Primary Contact objects
- Opportunity Product objects
- On the Concord Settings page in the Fields sent to Concord section, check or uncheck the fields to be available in Concord.
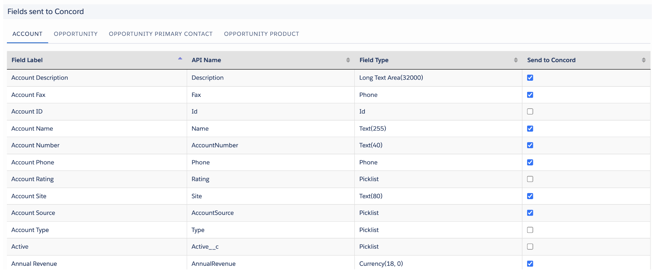
- Select the Save button beneath the listed fields to save your changes.
Configuring Automated Templates in Concord
Learn more about Creating Salesforce Automated Templates in Concord