AZURE Configuration Instructions:
- Create the Concord Application in Azure
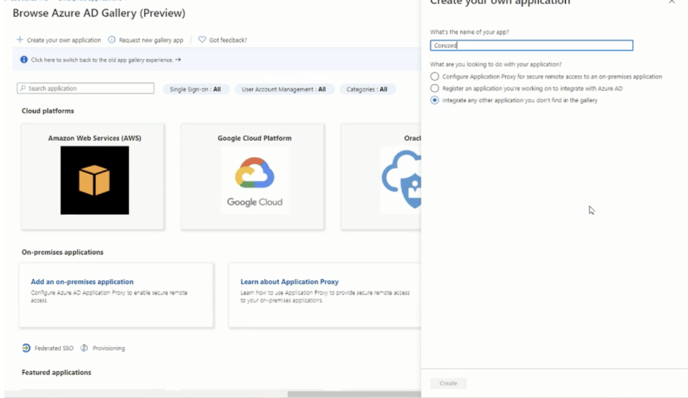
- Navigate to Dashboard > Enterprise Applications > and select +New Application

- Select Create your Application
- A panel will appear on the right side of the screen. Specify Concord as the Name of the Application.
- Select Integrate any other application you don’t find in the Gallery, and then the Create button.
- Define groups of users who will be able to access Concord via Single Sign-On by selecting Assign users and Groups under Getting Started
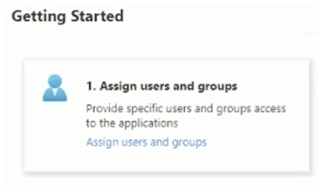
If groups are not created, anyone with an approved domain set up could be able to access Concord, From there, they will be automatically assigned as a user in your Concord account and given a seat, and you will be billed accordingly if additional seats are not available in your account.
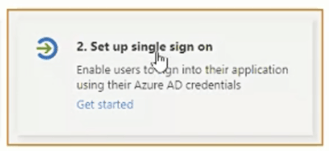
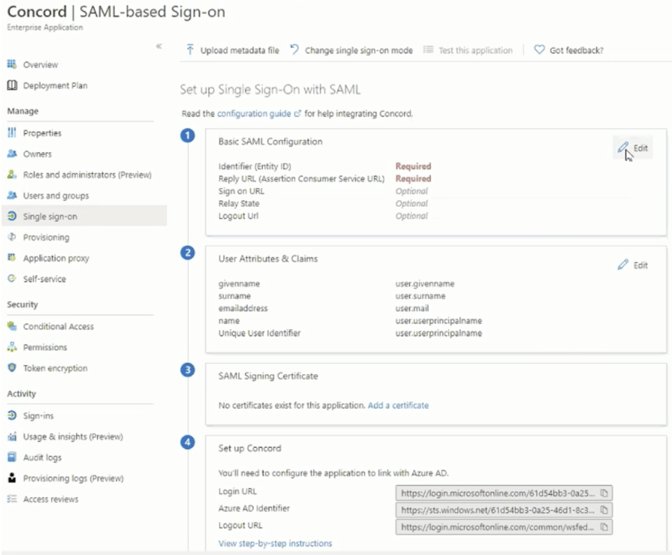
- Next, select Set up Single Sign-on
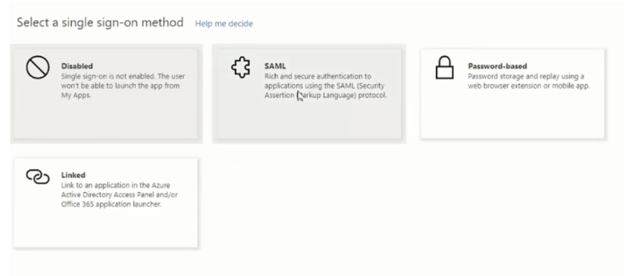
- Select SAML as the Single Sign-on Method
- Select Edit
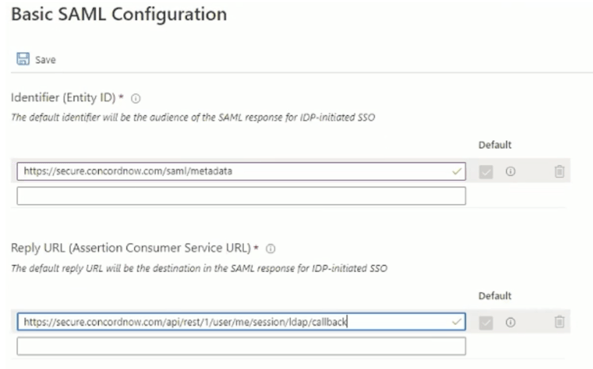
- A panel will appear on the right side of the screen. Enter the below information for EntityId and Reply URL and then SAVE.
- Exit out of Basic SAML Configuration
- If a popup appears to test Single Sign-On, select No. I’ll test later.
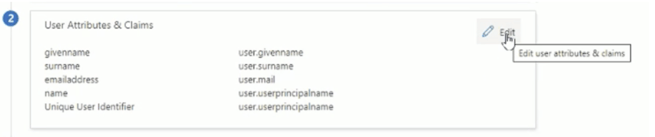
- Navigate to User Attributes & Claims and select Edit
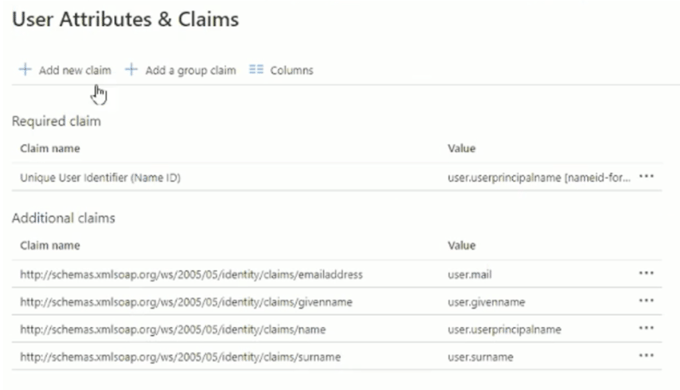
- There will be default attributes listed > Select +Add new Claim
- Enter in the required fields and Save (Image below)
- Name: ObjectID
- Source: Attribute
- Source Attribute: user.objectid

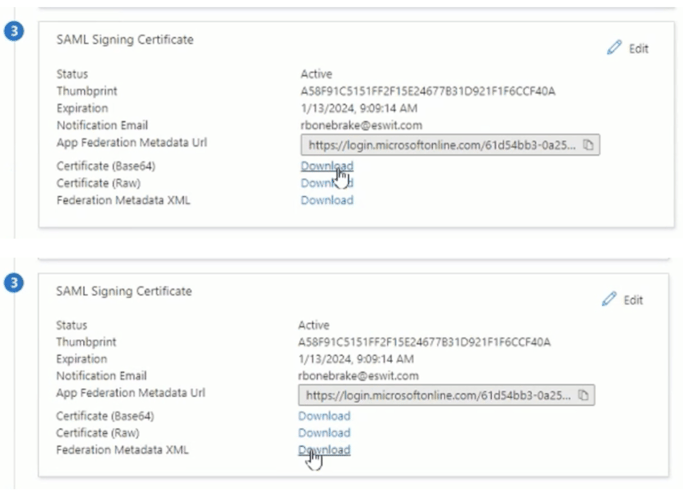
- Navigate to the SAML Signing Certificate section and download the Certificate (Base64) and the Federation Metadata XML
Once complete, email your Onboarding Manager the following:
- The downloaded metadata and certificate files
- A screenshot or list of your Additional claims section
- The email domain(s) you will use for Single Sign-On
- Your Onboarding manager will verify they have received the information required and provide the next steps for testing.